You're about to dive into the captivating world of low-key photography, where shadows, dance, and contrasts reign supreme. Get ready to embrace your inner master of shadows and wield your camera like a creative sorcerer. Whether you want to capture moody portraits or mysterious still lifes or add a touch of dramatic flair to your shots, low-key photography is your secret weapon. This guide will cover the equipment, tips, and tricks you need for low-key photography.
What Is Low Key Photography?
Low-key photography is a technique that involves capturing images with predominantly dark or black backgrounds with strong contrasts between light and shadow. In low-key photography, shadows play a vital role in creating a moody and dramatic atmosphere, while highlights are used sparingly to draw attention to specific areas of the composition. By deliberately underexposing the image, low-key photography allows for a focus on shapes, textures, and the interplay between light and shadow, creating visually striking and emotional photos. It's a creative approach that allows photographers to explore the beauty of darkness and unleash their artistic vision.
Related article: Beginner’s Guide to High Contrast Photography
Equipment & Accessories Needed for Low Key Photography
Don't worry, you won't need a truckload of equipment, but a few key pieces will be useful when capturing low-key photography.
Camera: First up, you'll want a camera that lets you take control. Ideally, go for one with manual settings to fine-tune your exposure.
Tripod: A sturdy tripod is also crucial to keep things steady, especially when using longer shutter speeds.
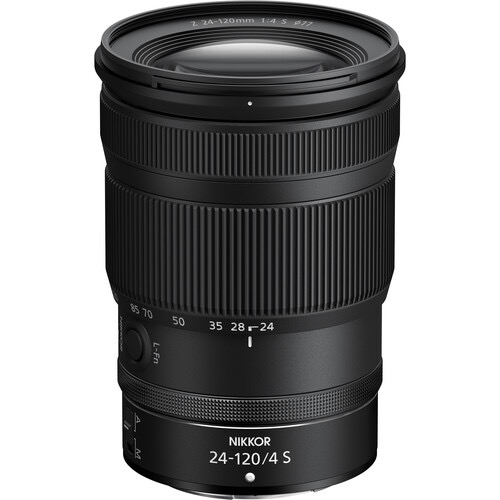
Lenses: As for lenses, you can experiment with different options depending on your subject and desired effect. If you want to isolate your image's subject with a gorgeous depth of field, a fast prime lens like a 50mm or 85mm will do the trick.
Lighting: While natural light can work wonders, having an external light source is like having a secret weapon. Light modifiers can help you shape and control the light. Here are a few options below:
Softboxes: Softboxes help create a soft, diffused light with gentle shadows. They can be used to evenly illuminate the subject while maintaining a low-key atmosphere.
Grids: Grids are handy in low-key photography as they allow you to precisely control and direct the light.
Reflectors: Reflectors can be used strategically to bounce back and fill in some light on the subject. This can help soften shadows and bring out details while maintaining a predominantly dark or black background.
Snoots: Snoots provide a concentrated, spotlight-like effect, perfect for highlighting specific elements or creating dramatic accents in your low-key compositions. They can add focused light on the subject while keeping the surrounding areas darker.
What Camera Settings Should You Use?
ISO
The ISO setting will depend on the lighting conditions and your desired creative outcome. Here are some considerations to help you determine the ISO setting for your low-key shots:
Start with a low ISO setting, such as ISO 100 or 200. Lower ISO values result in less digital noise and better image quality, especially in well-lit conditions.
You can maintain a low ISO if you rely on controlled artificial lighting, such as strobes or continuous LED lights. These light sources allow you to carefully control the exposure and avoid the need for high ISO settings.
Remember that increasing the ISO introduces more digital noise or grain into the image. Balancing the desired exposure with acceptable noise levels is a crucial consideration.
Related article: What is ISO in Photography - When do I Use it?
Aperture
The aperture, represented by the f-stop, plays a significant role in controlling the depth of field and the overall look of your images.
Use a wide aperture, such as f/1.8 or f/2.8, to achieve a shallow depth of field. This creates a narrow plane of focus, effectively isolating your subject while allowing the surrounding areas to fade into a soft, blurred background. This technique works particularly well for low-key portraits, where you want to draw attention to a specific element or detail.
Choosing a moderate aperture, such as f/4 or f/5.6, strikes a balance between depth of field and overall image sharpness. It works well for low-key compositions where you want to capture more of the scene while maintaining a distinct focus on the subject.
If you want to achieve a deeper depth of field, allowing more of the scene to be in focus, you can use smaller aperture like f/8, f/11, or beyond. This is useful when capturing low-key landscapes or scenes where you want to retain sharpness throughout the image. However, the smaller apertures will require longer exposure times or increased ISO settings to compensate for reduced light entering the camera.
Related article: What is Aperture and How to Use It?
Shutter Speed
The choice of shutter speed is essential for controlling the exposure and capturing the desired effect.
In low-key photography, the lighting conditions are often intentionally dim or controlled. To compensate for the reduced light, you may need to use longer shutter speeds to allow more light to reach the camera sensor. This is particularly true when using smaller apertures or low ISO settings. Be cautious of camera shake when using longer shutter speeds and use a tripod to maintain sharpness.
The specific shutter speed you choose depends on the desired effect you want. For example, when you use slower shutter speeds, such as 1/30s or 1/15s, you can introduce intentional motion blur to create a sense of mystery or movement in your low-key images. This works wonders when shooting subjects like flowing water or moving objects.
If you want to freeze action in your low-key photos, such as capturing a subject in mid-air or capturing a precise moment, you'll need to use faster shutter speeds. Start with a shutter speed of around 1/200s or faster to ensure sharpness and freeze the action effectively.
Depending on the scene and the use of ambient light, you may need to adjust the shutter speed accordingly. For example, if you have a mix of ambient light and controlled artificial lighting, use a faster shutter speed to minimize the impact of the ambient light.
Related article: What is Shutter Speed in Photography?
Tips to Perfect Low-Key Lighting
Now that you have your equipment and understand the settings let's go over some tips:
- Embrace the darkness: Low-key photography embraces the shadows and lets them work their magic. Don't be afraid of the dark! Instead, use it to create drama, mystery, and intrigue in your images. Shadows can add depth and make your subject pop.
- Control the light: While shadows are your best buddies in low-key photography, you must still wrangle the light to create those captivating contrasts. Experiment with different lighting setups, like using a single directional light source or light modifiers, to shape and mold the light to your liking. Remember, you're the master of shadows!
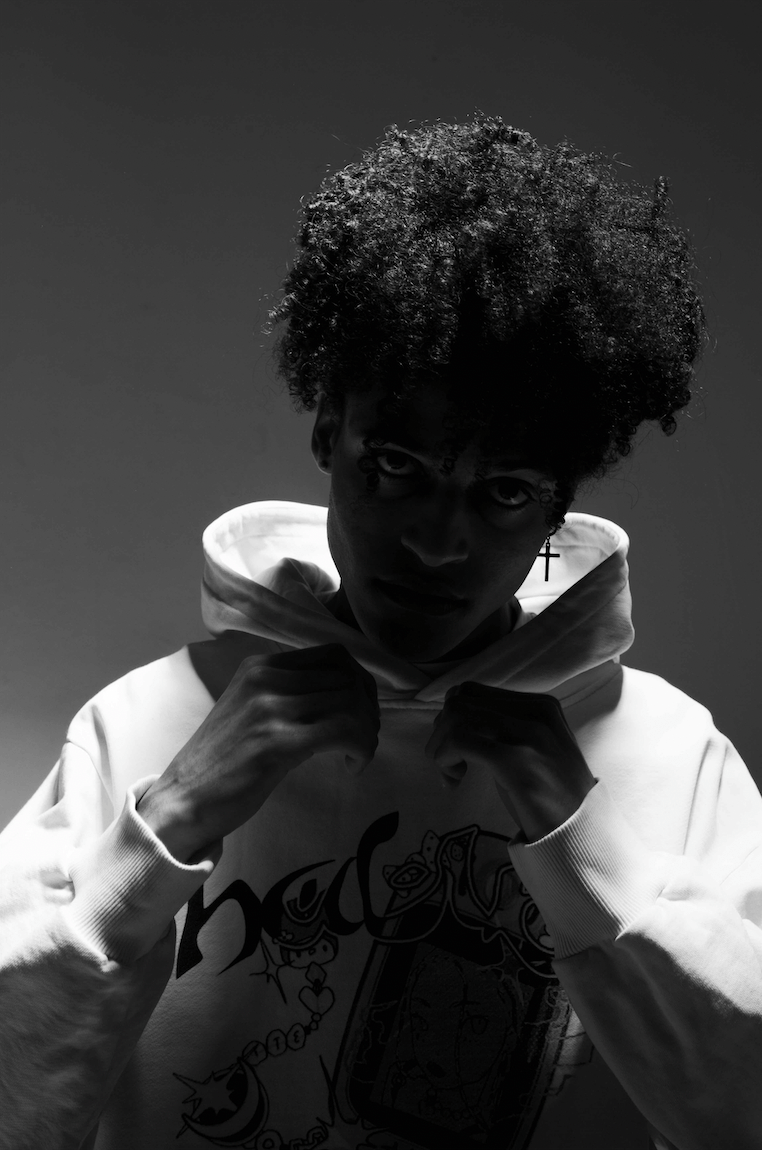
- Think about your subject: Low-key photography is fantastic for emphasizing specific subjects and capturing their essence. Whether it's a brooding portrait, a still life with a touch of noir, or a furry friend lurking in the shadows, choose subjects that lend themselves well to the low-key treatment. Look for interesting shapes, textures, and intriguing details that shine in the dark.
- Play with exposure: Find the right balance between light and darkness. Experiment with different exposure settings to achieve the desired mood. You can underexpose your shots slightly to deepen the shadows and create a more dramatic effect. Just be mindful to stay calm, or you might lose important details.
- Get creative with post-processing: Once you've captured your low-key shots, it's time to unleash your creativity in post-processing. Experiment with black-and-white conversions, adjust contrast and highlights, and play with tones to enhance the mood and make your images truly captivating.
- Rembrandt Lighting: Rembrandt lighting is a popular technique named after the renowned Dutch painter Rembrandt Harmenszoon van Rijn. It is characterized by a specific light pattern and shadow on the subject's face, creating a distinctive triangle-shaped highlight on the cheek opposite the light source. Rembrandt's lighting can be a fantastic addition to enhance the overall mood and create striking contrasts. To achieve Rembrandt lighting, you typically position the main light source at a 45-degree angle to the subject, slightly above eye level. It's crucial to ensure that the shadow side of the face does not fall into complete darkness but retains some details.
- Practice, practice, practice: Like any other photography technique, low-key photography takes practice to master. So, grab your camera and start shooting in different lighting conditions. Learn to anticipate how light and shadows will interact and how they can transform a simple scene into a captivating masterpiece.
Closing Thought
And there you have it, fellow photography enthusiasts - the secrets to capturing stunning low-key photos that will make your audience go "wow"! By embracing the darkness, controlling the light, and playing with shadows, you can create images that are mysterious, dramatic, and full of artistic allure.
Remember to equip yourself with the right gear, including a sturdy tripod, suitable lenses, and light modifiers to shape and control the light to your heart's content.
So, grab your camera, step into the shadows, and embark on your low-key photography adventure. Practice, experiment, and have fun as you unlock the hidden beauty that lurks within the darkness. Remember, every shutter click is a chance to create your masterpiece.
Related article: Create Moody Portraits with LED Lights
Related article: Beginner’s Guide to High Contrast Photography
Related article: Shallow Depth of Field: A Guide to Better Storytelling
Related article: Portrait Photography Tips Every Photographer Should Know - 10 Tips
Related article: Everything Looks Better in Black & White – Tips for Better B&W Photography