adapted from : http://blog.spoongraphics.co.uk/tutorials/how-to-create-a-sin-city-style-film-noir-effect-in-photoshop
We are going to use Photoshop to make a Sin City effect, with a dark smokey Detective Noir vibe. We will have only a few small details in color, with the rest being black and white. We will start with a color image, like this:

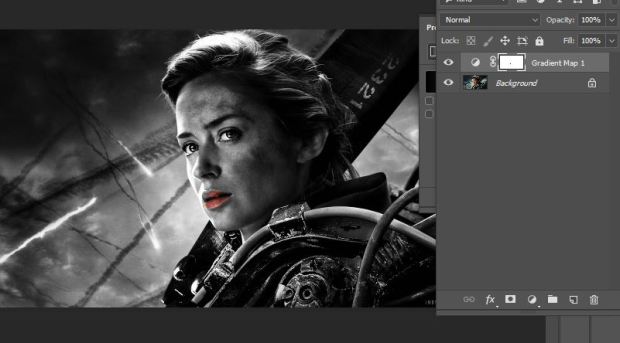
We will turn this image to black and white, but we will be doing it by adding a Gradient Map.
Step 1: After opening the picture in photoshop, we will click Layer>New Adjustment Layer> Gradient Map
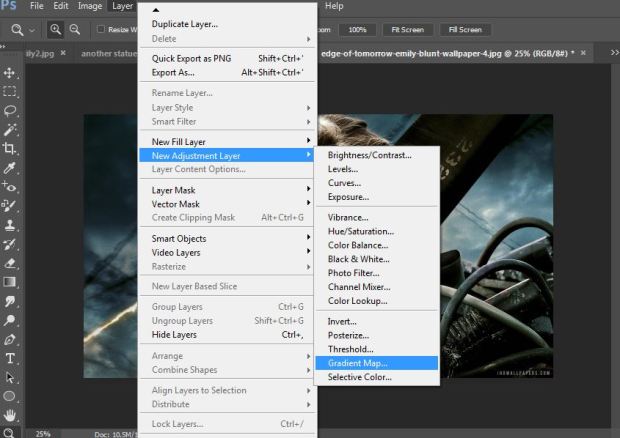
Then you click OK.

Next, choose the Black and white gradient
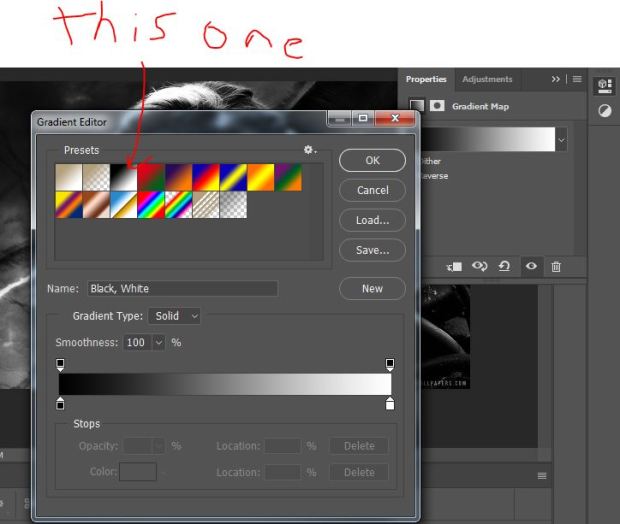
When you choose it, you should see something like this:

Step 2: Check out the layers and click on the white rectangle beside the words Gradient Map 1.

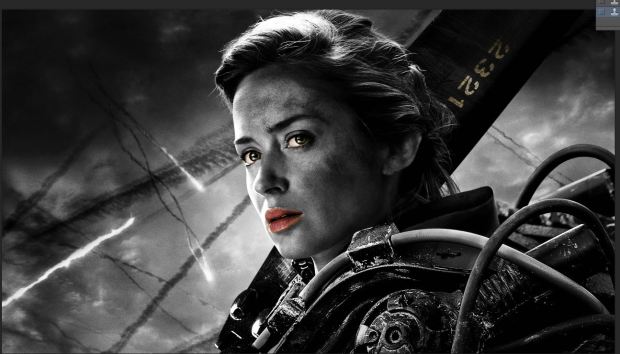
Then choose a brush and zoom in on the lips and with the color black selected, draw the lips back in.
I also drew in the numbers on the tube she is carrying, and her eyes.
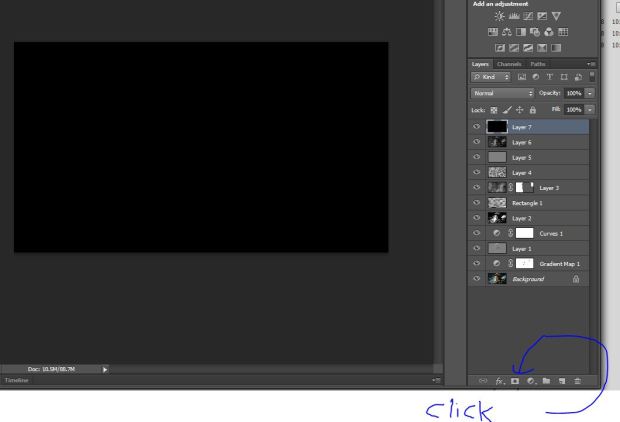
Step 3:Add a new layer by clicking the piece of paper being lifted up,

then click EDIT>FILL,

choose 50% Gray,

and it will look like the picture disappeared in to a cloud of grey! Don’t panic, you are doing everything right, just change the blending mode for the new layer to Overlay.

Now choose the burn tool


pick a soft brush
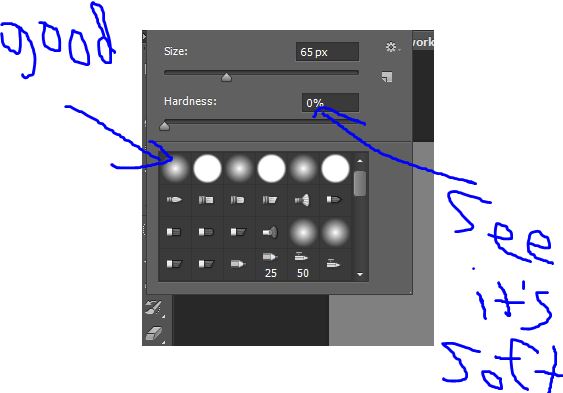
and lower the exposure value to about 20%.
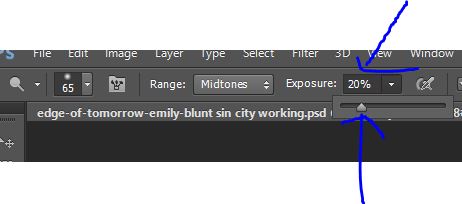
Change the range to shadows and paint over any shadows you can see, especially on the face(circled).
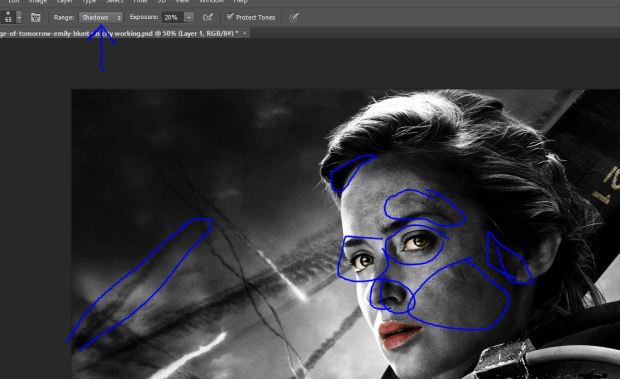
Zoom in and make the brush size smaller to trace the small shadows around the eyes.

Now switch to the Dodge tool and switch the range to Highlights. Do the same thing with anything really bright ( a highlight)

Step 4::Let’s make the contrast even more visible with a curves adjustment layer.
Click Layer>New Adjustment Layer>Curves

then click ok

then you can see the curves under properties

click on the line and adjust it so the blacks are darker, the whites are just a bit whiter, but don’t make the blacks too dark, or the whites too light.

STEP 5: Press CTRL + A to select all and then press CTRL+SHIFT+C to Copy Merged. These two keyboard commands will take all the layers and make them come together. Then click the new layer button

and then click Edit>Paste

Next, we will alter the levels. Click Image>Adjustments>Levels

Then move the shadows (black triangle) and highlights (white triangle) sliders towards the centre to boost the contrast. Keep going until the image almost looks like a stencil.

Go to Filter>Blur>Gaussian Blur and make the radius 10 pixels. This will remove the hard edges from this high contrast layer.


Click ok.
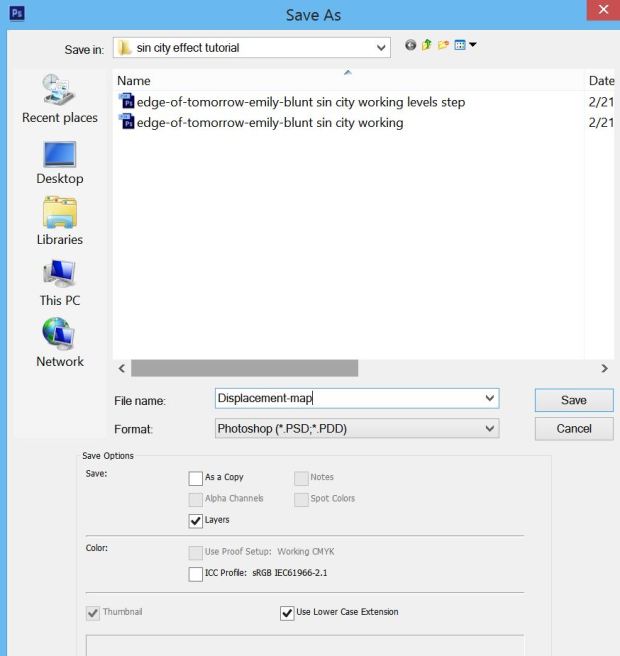
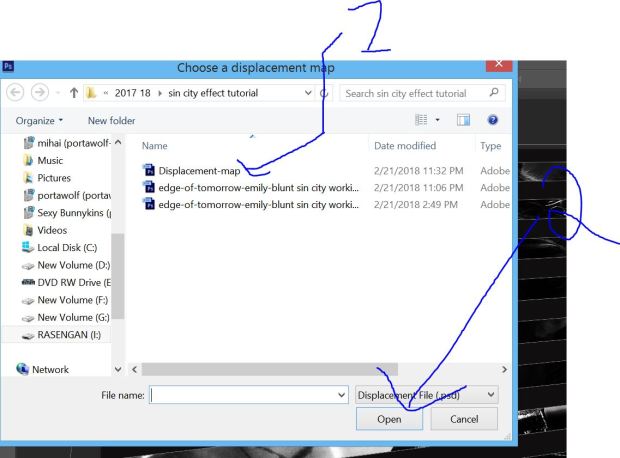
Then Click File>Save As so we can save the file with a different name.

Call it displacement-map and save it as a PSD format.
When we are working with displacement maps, we usually get rid of them after we use them, but this time we will use it to enhance the sin city effect.
Change the blending mode to Overlay and lower the opacity to 40%.

This smooths out some fine details from the photograph to make it look more like an illustration.
Step 6: Turn off the visibility for all layers by clicking all the eyes.


Make a new layer at the top of the stack of layers.


Then draw in a long thing black rectangle using the rectangle shape tool.

Press Ctrl+T to transform and then move the rectangle up and leave a space about the same size as where the original shape was.
Press CRTL+ALT+Shift+T to make a bunch of evenly spaced copies, using the move tool to move them up as you go.

Above: first copy
Below: after 7 more copies
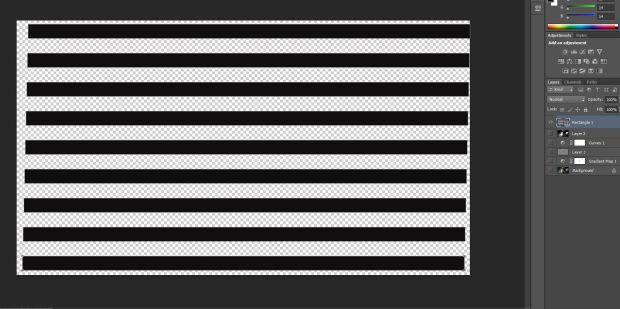
When I did it, they all came on the same layer. That’s nice. If you have a bunch of different layers all with just one rectangle on them then Select all the copies by clicking on their layers while holding shift and then Merge them by right clicking on one of the layers and choosing Merge layers.
Then press CTRL+T to transform the rectangle layer. Next right click and choose perspective.

Angle the lines so they go across the subject and look like the shadows of a window blind. When you like the look, press enter.

Now use the displacement map we saved earlier to warp the lines. Click Filter>Distort>Displace.


Add a Gaussian blur to eliminate the hard edges, Filter>Blur>Gaussian Blur (make the radius around 16 pixels.


Then reduce the opacity of the layer to between 70 and 80%.

Step 7: Add some black and White Smoke
Find some smoke by searching (preferably at duck duck go, or ixquick) for black and white smoke.
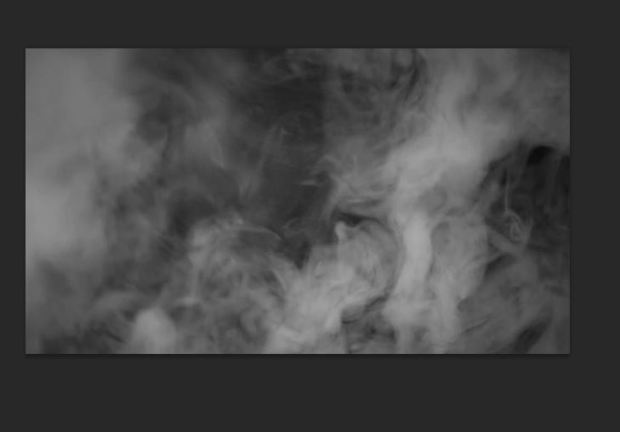
Open it in photoshiop and copy and paste it in to the image.
Scale it to the size of the picture using EDIT>Transform>Scale. Push enter to finish the transformation,

Change the blending mode for the smoke layer to Lighten,

Then add a layer mask.

Get a large soft brush and paint over the person to get rid of the smoke around their face.

Then change the opacity of the layer to a level that makes it a subtle effect, but you can still see the smoke (I choose 37 %.)

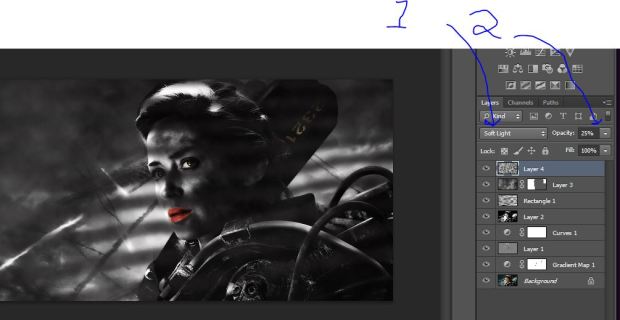
Step 8: Bring out the smoke effect
Make a new layer at the top of the other layers

Then click Filter>Render>Clouds


Now change the blending mode to soft light, and the opacity to 25%.
Step 9: Two things to do for the finishing touches
Press CTRL+A, to select all, then CTRL+SHIFT+C to make a copy merged clipping.
Make a new layer and click Edit>Paste

Now Click FILTER>Other>High Pass

Choose a 1 px radius

Change the blending mode to linear light, and make the opacity 35%, this will sharpen up the images details.
Press CTRL+A, to select all, then CTRL+SHIFT+C to make a copy merged clipping.
Make a new layer and click Edit>Paste

Next Click Filter>Blur>Iris Blur

Change the size of the iris blur to cover the subjects face.

and then change the radius to 3 px.

Finish the blur by clicking ok.

This makes a subtle 3d depth of field effect.
Step 10 : The Final step
Make a new layer
Fill it with black Edit > Fill


Add a layer mask
Erase around the center of the image with a large soft black brush

Reduce the opacity to around 60%

Wooo hoo! We are done!
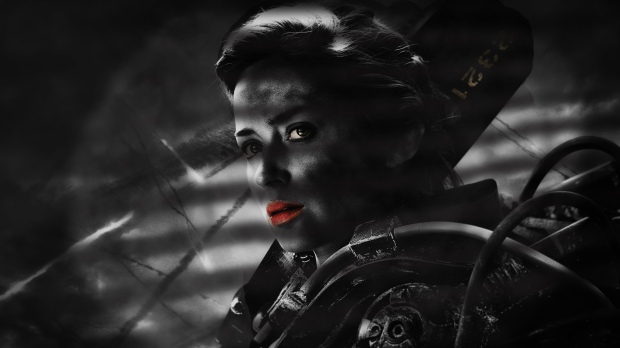
When you have finished it, try this: Sin city is all about a detective noir dark vibe. Do the Sin City effect on two very different images: use a sunny friendly picture and see how it changes, and you also start with an image that already looks dangerous.
You will turn in all 3 sin city effects.
