Studio Photography: Low Key Split Lighting
Now I have my tiny but affordable storage box photography studio and my upcycled DIY studio strobe, it’s time to begin experimenting with lighting techniques.

What is Split Lighting
Split lighting is a straightforward but versatile technique that requires only one light. You cast light on one side of the face, leaving the other side in shadow. This creates a dramatic lighting effect that is most often associated with male portraits but can be used well on many subjects including children and pets.
Whilst split lighting is straightforward to master, there is also depth and versatility to the technique. The examples here are all low key (think dark, black, lots of shadows) but it works well for high key (think bright, white, fewer shadows) settings as well. The technique lends itself well to story telling through the addition of props and the use of negative space. Even a simple change such as altering the angle between the camera and the light can dramatically alter the ‘mood’.
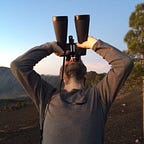
Inspiration


Equipment
Standard Reflector, Diffuser and Honeycomb Grid
I’m using a 18cm (7-inch) reflector, a honeycomb grid and a diffuser. This type of reflector, is often called a standard reflector and has a Bowens-compatible S-type mount. These standard reflectors are available from a range of brands and generally follow a generic design, though the build quality varies.
(Note that confusingly, the term reflector is also used to describe collapsible reflectors.)
The items I’m using are branded Andoer and cost around €25 for the reflector, a 60º honeycomb grid and a soft, cloth diffuser “sock”.
Similar items are available singly and in various kits from Andoer, Bresser, Godox, Neewer and Rollei as well as unbranded stock.
The light from the bare reflector has a spread of around 80º. Honeycomb grids can be placed in the opening of the reflector to create a more focussed light that doesn’t spread as wide. The smaller the pattern on the grid the stronger the effect. The most frequently used pattern is a 60º grid. Other, smaller grid patterns are available but these generally less useful as the key light in a single light setup.
Strobe
- DIY studio strobe using a Vivitar 283 speedlight with a custom-built manual power controller
Camera
- Nikon F80D with a Nikkor AF-S 50mm f/1.8 G lens
Film
- Fomapan ISO 100 black and white film
- Exposed at ISO 100, f4 and 1/60
- Developed in Fomadon LQN (6:45 at 20º using a rotary processor)
Studio Setup
The shoot was done in my storage box studio.

The subject is 50cm in front of the background.
The light is placed at head height, 50cm from the subject and at a right angle (90º) to the subject.
The camera is approximately 100cm from the subject and at a right angle (90º) to the light.
The Shoot
As a challenge to myself this shoot was done on a single 36 exposure roll of film. I find that setting myself a goal like this helps keep me focussed.
Bare Reflector

I’ve marked the shots taken at minimum power and at the -7 EV power settings but I marginally prefer the shot taken at -7 EV.
At the -6 EV power setting there is more light than want on the clothing. I could control this by blocking (also known as ‘flagging’) the light, so a shadow is cast on the clothes. However, that is tricky to achieve given that I want to keep the triangle of light on the chest area.

Reflector with 20º and 40º Grids
A 60º honeycomb grid is the typical modifier used with a reflector for this type of portrait work and as a consequence it’s the most widely available.
Since I have other grids I thought I’d experiment a little.

(I wasn’t totally consistent with controlling the ambient light which is why one of the buttons is visible on the minimum power shot.)
I don’t like the effect I get with the 20º grid, it might lend itself to a moody, “floating head” style of portrait but that’s not the look that I’m after.
The -5 EV shot is the best of a bad bunch, the cheek is lighter but not so burnt out as it is in the -4 EV shot. In both cases, the triangle of light on the chest is absent.

The effect with the 40º grid is a marginally better that with the 20º grid but it’s still a long way from the look that I’m after. Again, the triangle of light on the chest is all but absent.

(I haven’t included these series taken using the 40º grid because those negatives are excessively dirty. I was experimenting with how much wetting agent I use. Normally I only use a drop but this time I used the manufacturers recommended 3mls. Big mistake.)

Reflector with 60º Grid

The effect of the 60º grid is closer to the look that I want. I prefer the exposure on the cheek of the -7 EV shot but I also like the brighter lighting on the chest in the -6 EV shot.
The overall look is OK but I’m still not getting the light and shadow on the left shoulder that I want.
Reflector with Diffuser
The diffuser I’m using is made of white cloth and is pulled over the front of the reflector like a “sock”. The diffuser blocks about two stops (2 EV) of light as well as softening the edges of the shadows.

The effect is that some of the increased spread that comes with the higher power setting is retained but without burning out the highlights on the hair and cheeks.
Reflector with 60º Grid and Diffuser

The effect of the 60º grid plus diffuser is better than with just the 60º grid but the best shot (-5 EV) lacks the highlights on the left shoulder that I want.
Side-by-Side Comparison

Using the shot with just the reflector as the baseline, I’d like to see more detail in the light and shadow on the left hand shoulder and sleeve of the cardigan.
The shot with the 60º grid lacks any detail in the sleeve of the cardigan. The highlights on the hair also look slightly burnt out compared to the reflector only shot. (The slightly different crop is the result of the dirty negative.)
The shot with the 60º grid plus diffuser is good and I prefer it to the reflector only image. There is nothing to balance the triangle of light on the chest but if that was the best image on the roll then I’d be happy.
Fortunately, the shot with the reflector and the diffuser is better still. The light and shadow on the left hand shoulder and on the sleeve of the cardigan is more balanced than with the reflector only. The light doesn’t fall off as quickly and the highlights in the dress are more pronounced. Together these two factors provides balance to the triangle of light on the chest.
The icing on the cake is how the horizontal shadow on the chest (highlighted) softly fades away before it reaches the right hand collar.