How to Make the 'Pleasantville' or 'Sin City' Effect in Final Cut Pro X 10.4
In this tutorial we will show you how to make the 'Pleasantville' or 'Sin City' look with Final Cut Pro X's new colour tools
The films Pleasantville, Sin City and many music videos have all used the same technique. The isolation of a specific colour whilst the rest of the frame/spectrum has been completely desaturated into black and white.
This has always been a very popular look to achieve and the good news is that the new colour tools in Final Cut Pro X (10.4) make it even easier to get great results
The new tools in FCPX allow the editor very fine control over colours. Let's take this example of a brightly coloured image of a woman and try to isolate her red lipstick.

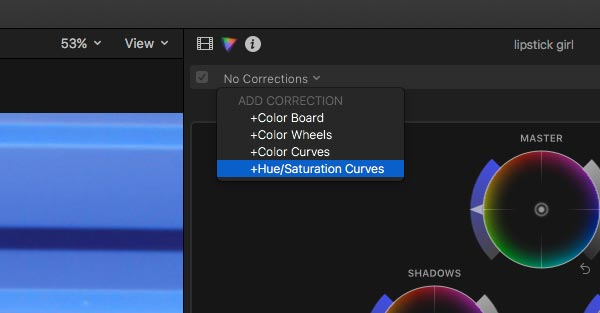
Use the shortcut CMD 6 to open up the colour correction controls in the Inspector.
The type of colour correction visible on opening will depend on what is set in the Preferences.

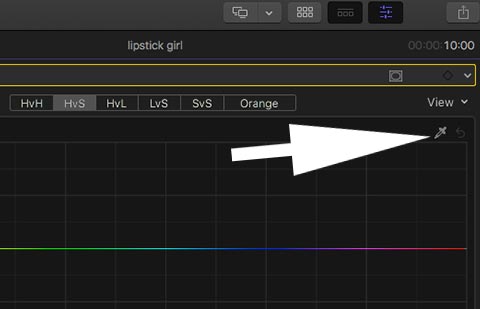
We need to use the Hue/Saturation Curves which can be accessed from the dropdown menu.
You will be presented with six different curves/lines, the one we are interested in is the second one down, HUE Vs SAT (Saturation).
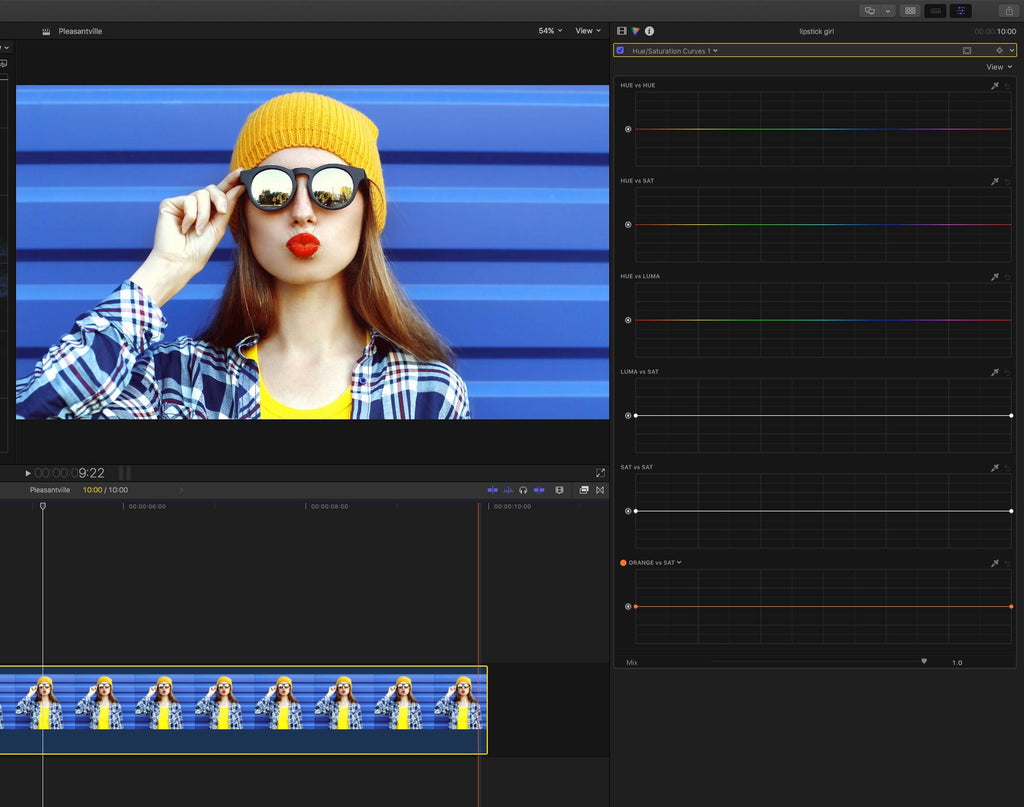
This control will adjust the saturation of a colour depending on the hue. The spectrum is displayed across the line. the higher the line, the more saturation for that hue.
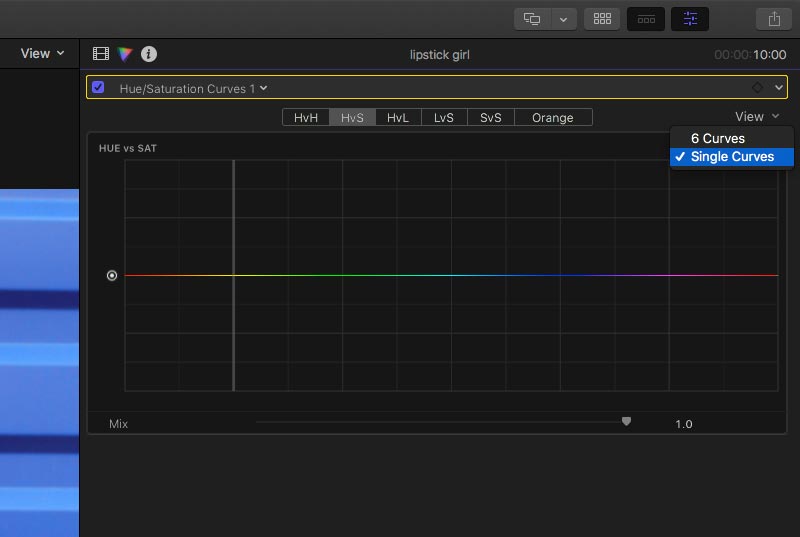
You can change the display to show one line by using the drop-down menu in the top right corner. It makes adjusting the controls easier with a larger display.
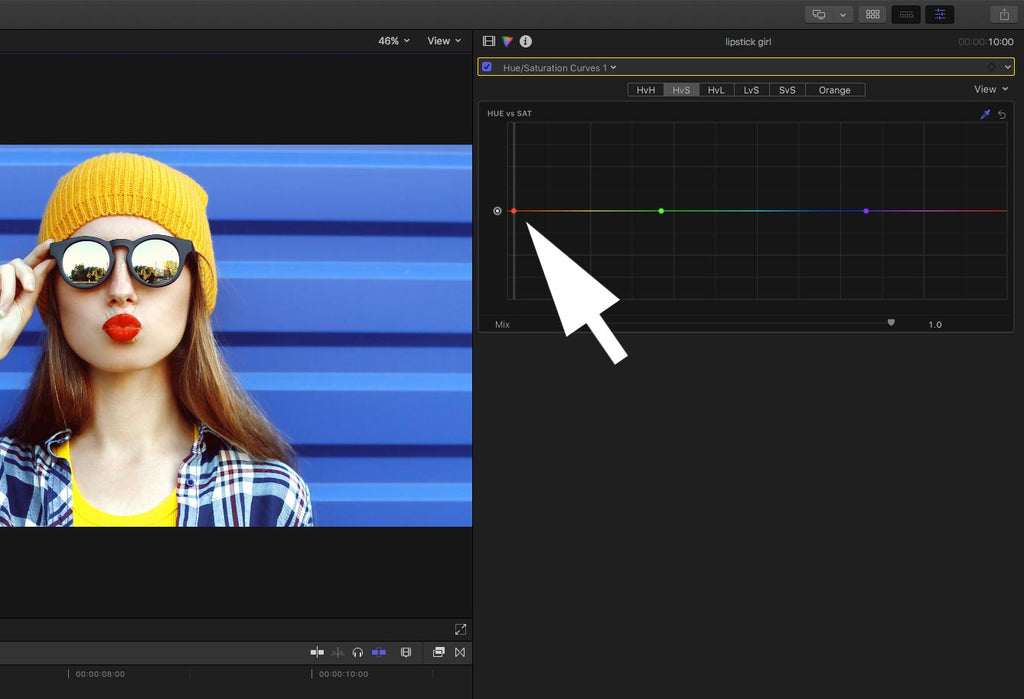
We need to isolate the red lipstick.
Click the eyedropper on the top left of the HUE Vs SAT control.
Then move over to your image or video and Click Drag an area of the colour you want to isolate. We enlarged the FCPX canvas here to help get the selection right without sampling any unwanted colours.

This will automatically put three points on the colour line. The one we are interested in is the one on the far left that has the vertical line running through it. This is the hue of the lipstick.
Then all we have to do is reduce the saturation of every hue apart from the lipstick. Do this by dragging the other two control points down and towards the lipstick hue. Think of the curve being joined together at both ends. It is slightly unfortunate that red is pushed up against the left hand side.
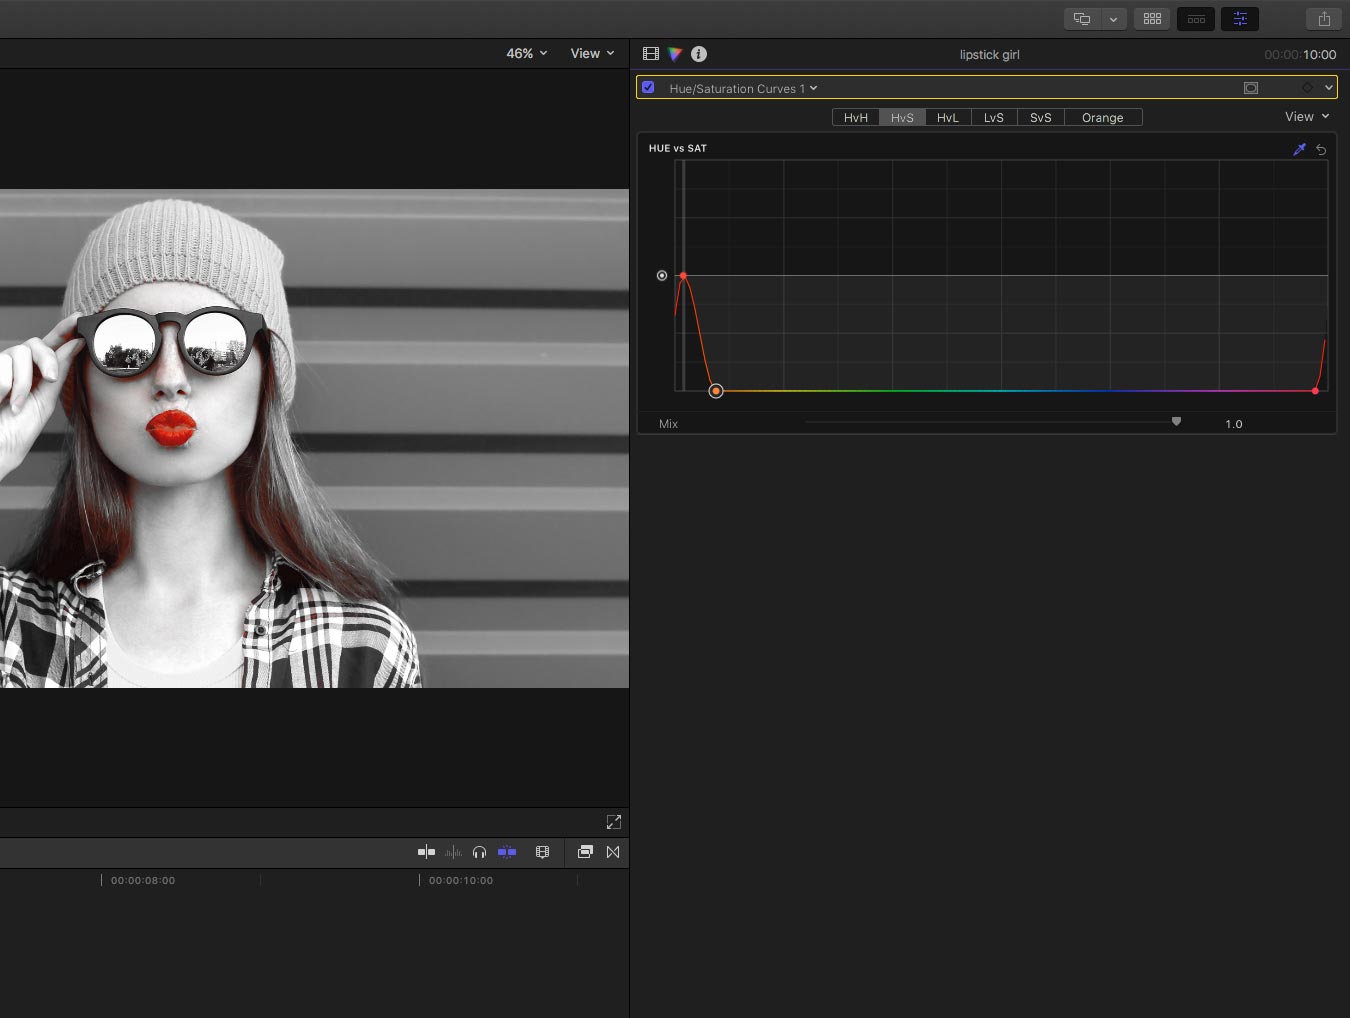
And there you have your bright red lipstick on top of a black and white image. No plugins needed and no stacking of layers - this all happens on the clip.

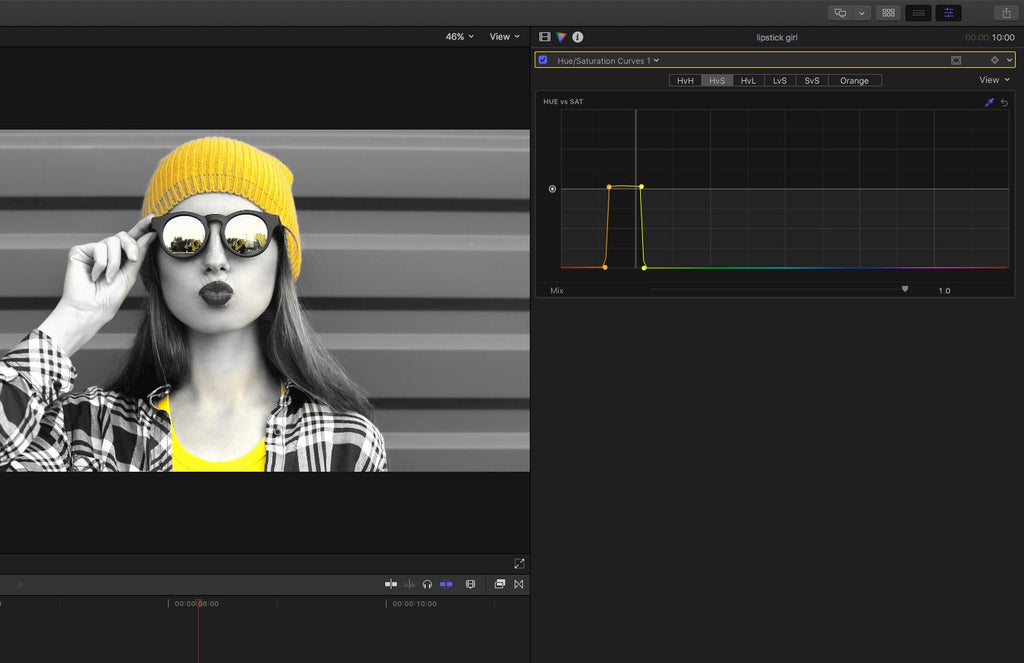
You can of course pick any colour, not just red. Here we have isolated the yellow and it makes reading the HUE Vs SAT curve slightly easier. We had to add an extra control point as the hues of the hat and vest were slightly different
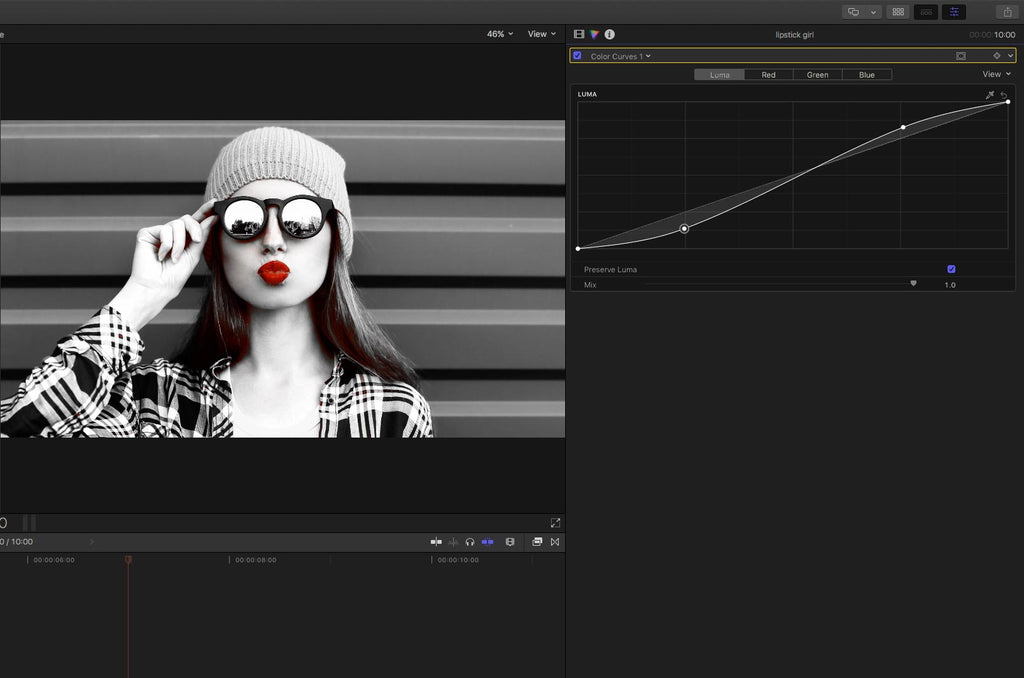
Back to red and to go 'grungier' or to emulate the Sin City look, apply another colour correction instance, this time a Luma Curve which can be found in the Colour Curves selection.
Add a couple of control points to give it an 'S' curve to deepen the blacks and extend the highlights.
As with all keys, you might have to fine tweak the controls when the subject moves. You can keyframe the whole colour correction for a smooth transition.
You also might have to add a shape mask if the colour you isolated appears in the background. In the yellow example, you can see this happening in the woman's glasses reflections.
One Final thought. Don't forget you can save this look as a custom effect by clicking on the Save Effects Preset button in the bottom right hand corner.
1 Response
Leave a comment
Comments will be approved before showing up.
Also in Tutorials

How to Start & Successfully Run Your Own YouTube Channel
Why Doesn't My Microphone Audio Work in Final Cut Pro?
Stephan Lambert
July 27, 2020
Hi,
Great effect indeed, thanks !
I was wondering if this woud be possible in apple motion 5.3 ?
Again, thank you for an advice.