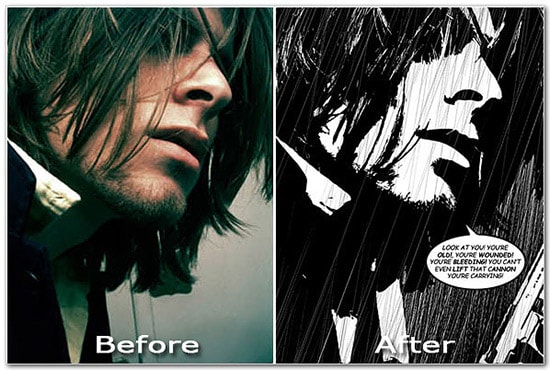
How to Create a Sin City Effect in Photoshop
Here, you will learn on how you can create a sin city effect with some photo edit in Photoshop. I hope it will help you both the beginner and advanced level of students in a great deal.
Photo Courtesy – http://bestsiteslist.net/
Here, the background will be the same which means that it will be colorful. On the contrary, the rest will be black and white. At first, select a background image under a background layer. Duplicate the layer. Change the adjustment layer to ‘Black and White.’ Select ‘Brush Tool’ with standard size and just color in the background. It is very basic and easy method. It can be done in another way which is a bit complicated. Here, you need to go to Select> Color Range from the above toolbar. With the use of the left eye drop, select the color. Make sure that it is selected as ‘Sample Colors.’ After making some adjustments there, take the ‘Magic Wand Tool.’ Select those areas where you want to keep the color. Again click on Select> Inverse from the above toolbar and change the background layer to ‘Black and White.’ That sums up the whole process.
I hope that it will help you and from now on, hopefully you will follow this procedure more often in Photoshop and be an expert in this field in the future.
In this section, you will learn on how to make the matrix text effect in Photoshop. I hope that is helpful for all and the beginner level of Photoshop students especially. At first, we need … Continue reading How to Make the ‘Matrix Text Effect’ in Photoshop
Read More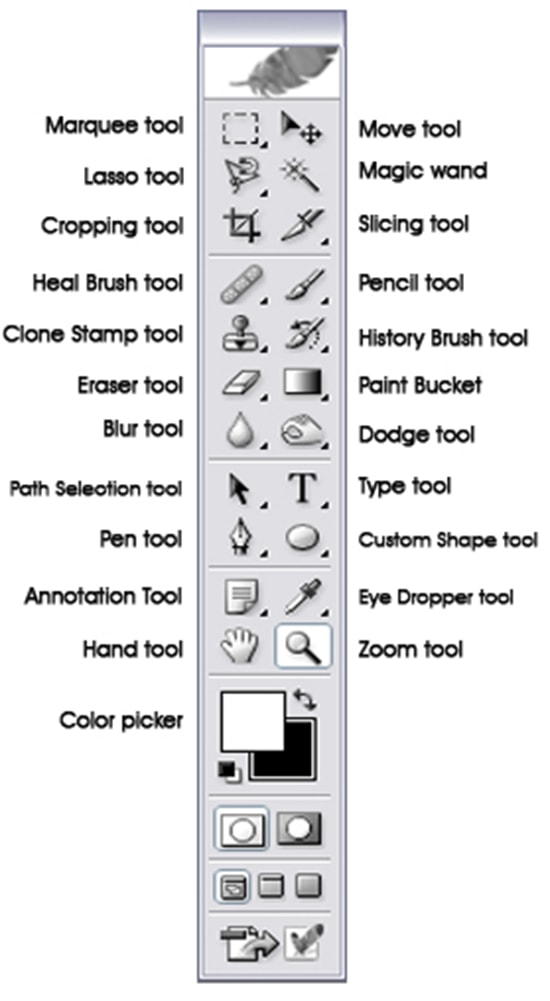
In this tutorial, we will give you a quick introduction to the Photoshop toolbar. You need to know these toolbar so that you know how to photo edit. All the tools in the toolbar have shortcuts … Continue reading Introducing Photoshop Toolbar
Read More